How to add a logo
Adding a logo to One Platform is a straightforward process. A distinctive logo is crucial for your brand's identity and creating a memorable online presence. Follow these simple steps to upload and display your logo.
Step 1: Log In to Your OnePlatform Account
- Open your web browser and go to the One Platform website.
- Log in to your One Platform account using your credentials.
Step 2: Access Chain/Outlet Customisation
- From the OnePlatform dashboard, navigate to the Chain/Outlet section.
- Select your chain / outlet you want to add the logo to.
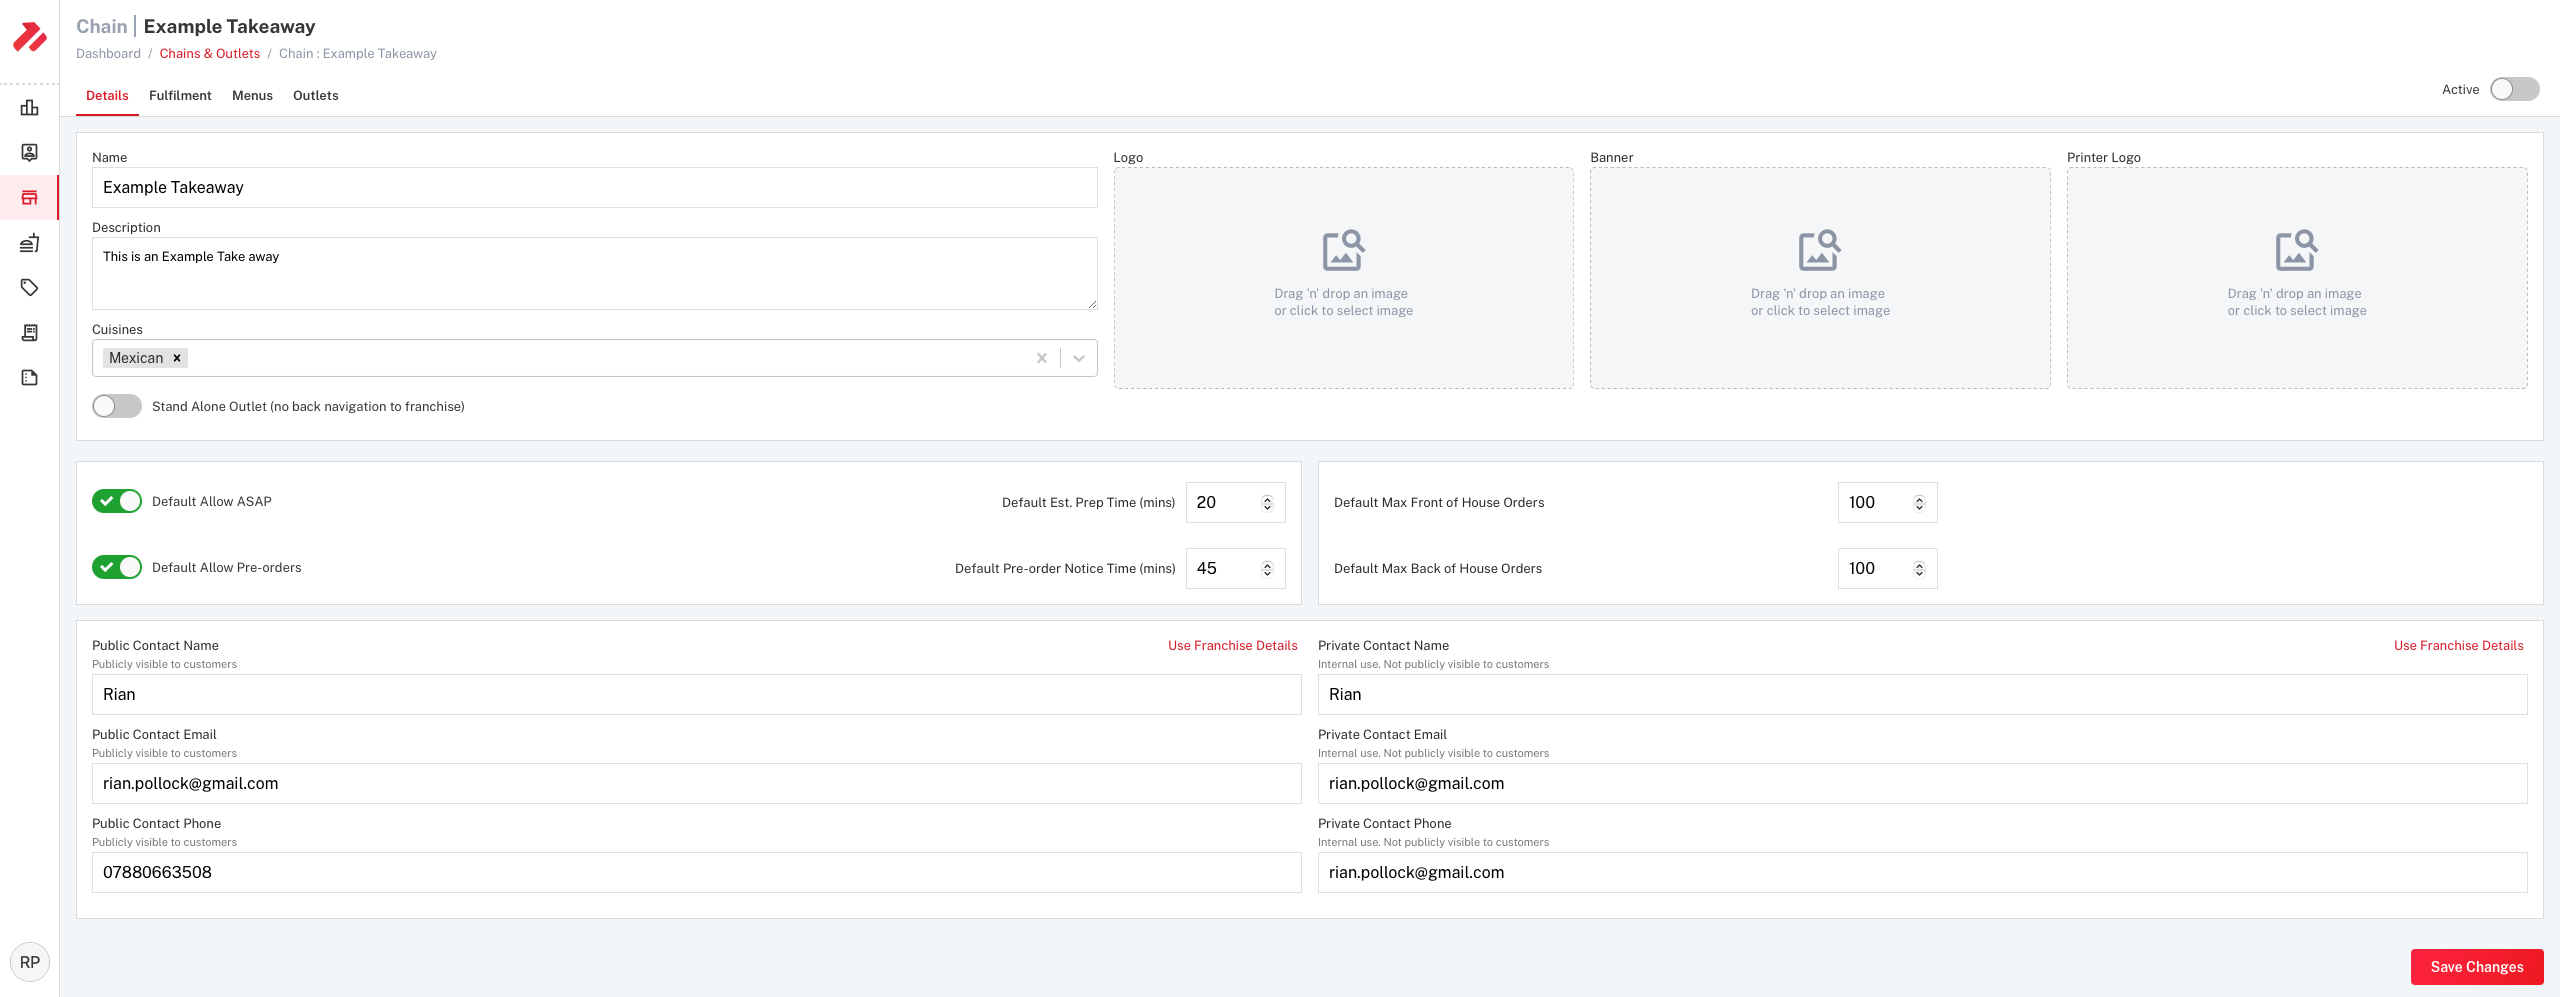
Step 3: Uploading Your Logo
Option 1: Drag-Drop Method
- Once onto the Chain/Outlet section, choose which section you want to add your photo into, either the Logo, Banner, or Printer Logo section.
- Find the image file of your logo on your device.
- Drag the logo image from your device and drop it into the specified area.

Option 2: File Selection Method
- Click on either 'Logo', 'Banner', or 'Printer Logo'
- A file selection dialog will appear.
- Navigate to the location of your logo image on your device and select it.

Step 4: Save Your Changes
Don't forget to save your changes to make your logo live on your One Platform system.
Congratulations! You've successfully added your logo to the One Platform system, enhancing your brand's online presence.
Remember, your logo is an important part of your restaurants identity, so choose a high-quality image that represents your brand effectively.
If you encounter any issues or have questions about customizing your chain/outlet further, feel free to reach out to One Platform's support team for assistance.